I'm Caitlin - culinary hostess, wellness retreat curator, and homebody at heart. This blog is where I share seasonal recipes, intentional living tips, and behind-the-scenes moments from my kitchen, travels, and retreats.
Here to make healthy living feel thoughtful and approachable - one recipe, ritual, or gathering at a time.
WELCOME!
Affiliate links included. Thanks for supporting the brands I trust!
Golden edges, a tender center, and the kind of waffle that always satisfies without being complicated. These Gluten-Free Buttermilk Waffles are made for slow mornings, overnight guests, and anyone who loves a breakfast that feels both intentional but easy to pull off.
Waffles are one of those foods that instantly invite you to linger, to pour another cup of coffee, and to gather everyone around the table instead of rushing out the door.
This gluten-free buttermilk waffle recipe is one I come back to again and again because it delivers exactly what we want : crisp on the outside, fluffy on the inside, and reliable every single time. No specialty techniques, no complicated steps – just a thoughtfully balanced batter that works with you, not against you.
WHAT TO EXPECT IN THIS POST
Why You’ll Love This Recipe
Ingredients
Equipment
Step-By-Step Instructions
Make-Ahead Batter Tip
Storage & Freezing Tips
Frequently Asked Questions
Hosting Tip
Other Recipes You’ll Love
Recipe Card
WHY YOU’LL LOVE THIS RECIPE
These waffles are naturally light thanks to buttermilk, with just enough richness to feel indulgent without being heavy. The gluten-free flour blend creates structure while still allowing the interior to stay soft and tender.
They’re equally perfect for a quiet weekday morning or a weekend table set for guests – which makes them a staple worth keeping in rotation.
INGREDIENTS
Each ingredient plays a role in texture and flavor, so keeping things fresh really matters here.
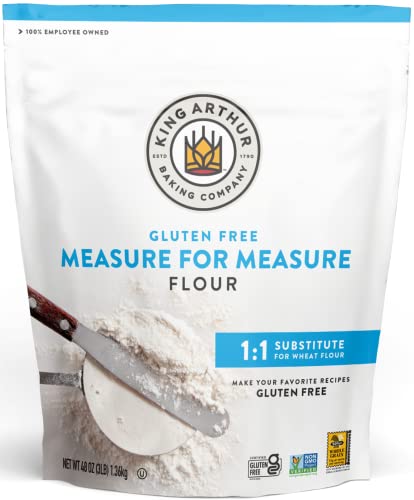
Gluten-Free All-Purpose Flour
Sugar : adds balance and helps with browning
Baking Powder & Baking Soda : creates lift and crisp edges
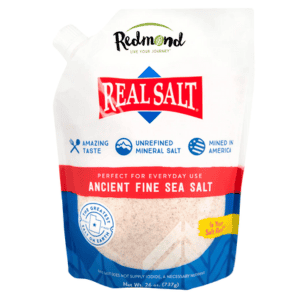
Fine Sea Salt : enhances flavor without overpowering
Buttermilk : adds tang and tenderness
Eggs : structure and richness
Melted Butter or Neutral Oil : moisture and flavor
Vanilla Extract : softens and rounds out the batter
EQUIPMENT
Waffle Iron
Mixing Bowls
Whisk
Measuring Cups & Spoons
STEP-BY-STEP INSTRUCTIONS
Preheat your waffle iron according to the manufacturer’s instructions. If there is a knob to adjust the doneness, set that at this time.
In a large bowl, whisk together the gluten-free flour, sugar, baking powder, baking soda, and salt.
In a separate bowl, combine the buttermilk, eggs, melted butter, and vanilla.
Pour the wet ingredients into the dry and gently mix until just combined. A few small lumps are perfectly fine. If you’re making in advance, cover and refrigerate overnight (see make-ahead batter tip).
Cook the batter in your waffle iron until golden brown and crisp on the outside.
Serve immediately or keep warm in a low oven while you finish the batch.
MAKE-AHEAD BATTER TIP
Many quick batters – like waffles, pancakes, muffins, coffee cake, and other quick breads – can be mixed ahead of time and refrigerated overnight. Letting the batter rest allows the flour to fully hydrate and the flavors to settle, which often leads to better texture and structure.
I usually mix waffle batter the night before, store it covered in the refrigerator, and then take it out about 60 – 90 minutes before cooking so it’s not going straight from cold to heat.
As always, use fresh ingredients, keep batters properly refrigerated, and follow what works best in your kitchen.
STORAGE & FREEZING TIPS
Leftover waffles can be stored in an airtight container in the refrigerator for up to 3 days. Reheat in a toaster or oven to bring back their crisp edges.
These waffles also freeze beautifully. Let them cool completely, freeze in a single layer, then transfer to a freezer-safe bag or container. Reheat straight from frozen for an easy breakfast or snack!
FREQUENTLY ASKED QUESTIONS
What gluten-free flour works best for waffles?
I prefer to use Cup4Cup or King Arthur 1:1 Gluten-Free flour.
Can I make the batter ahead of time?
Yes. This batter can be mixed the night before and refrigerated overnight (covered) for even better results.
Can I make these dairy-free?
You can substitute dairy-free buttermilk (plant-based milk with 1 tablespoon of vinegar or lemon juice per cup of milk) and use oil instead of butter.
How do I keep waffles crispy?
Avoid stacking them directly on a plate. Keep finished waffles warm on a wire rack or baking sheet in a low oven until serving.
HOSTING TIP
When serving waffles to guests, keep them warm on a baking sheet in a low oven and set up a simple topping station. A bowl of berries, warm maple syrup, softened butter, and one expected option – such as whipped mascarpone or lemon curd – instantly elevates the experience with little effort.
Crisp on the outside, fluffy on the inside, these gluten-free buttermilk waffles are easy to make, freezer-friendly, and perfect for slow mornings or hosting brunch at home.
Ingredients
Scale
2 cups gluten-free all-purpose flour
2 tablespoons sugar
2 teaspoons baking powder
1/2 teaspoon baking soda
1/2 teaspoon fine sea salt
2 cups buttermilk
2 large eggs
1/3 cup melted butter (or neutral oil)
1 teaspoon vanilla extract
Instructions
Heat waffle iron. If there is a knob for doneness, set as desired.
Whisk flour, sugar, baking powder, baking soda, and salt.
In a separate bowl, mix buttermilk, eggs, melted butter, and vanilla.
Pour wet into dry and gently mix until just combined (a few lumps are fine).
Cook in your waffle iron until golden and crisp.
Serve warm with syrup, berries, or powdered sugar.
Batter can be mixed ahead and refrigerated overnight.
Let batter rest at room temperature for 60 – 90 minutes before cooking.
Prep Time:10 minutes
Cook Time:15 minutes
Category:Breakfast + Brunch
Method:Waffle Iron
Cuisine:American
Caitlin Lindsey
post author
Caitlin is the creative visionary behind Fit to Entertain, where food, wellness, and intentional living come together. She's passionate about helping others bring joy to the table and live beautifully - one meal at a time.


 Buy Now →


+ Show / Hide Comments
Share to: