Description
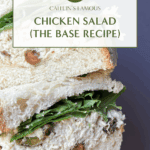
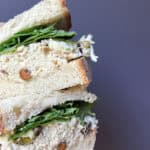
A simple, creamy chicken salad base that’s endlessly customizable and packed with real-food ingredients. Perfect on toast, greens, crackers, or stuffed in a croissant.
Ingredients
Scale
- 7 – 10 boneless, skinless chicken tenderloins (or 4 – 5 chicken breasts cut into 3 pieces each)
- 6 – 8 celery stalks
- 1 egg
- 1 cup avocado oil
- 1 1/2 teaspoons sea salt
- optional : nuts, fruit, herbs, or other add-ins
Instructions
- Boil the Chicken : Bring a large saucepan or pot of water to a boil. Add the chicken tenders and cook for 17 minutes, or until cooked through. You’ll likely notice the rolling boil slow to a gentle simmer after adding the chicken. That’s totally normal. When your timer goes off, remove the chicken with tongs and transfer to a large bowl to cool slightly.
- Prep the Mayo : Crack your egg into a glass mixing cup and whisk on high with a handheld mixer or immersion blender for 20 seconds. Add 1/3 cup of avocado oil and blend again for 20 seconds. Repeat until you’ve added a total of 1 cup of oil. The mixture should emulsify into a thick, creamy mayo. Season with sea salt and refrigerate until ready to use. Note : I highly recommend making your own mayo here. Store-bought versions tend to have a more distinct flavor that can shift the entire recipe, and not in a good way. Every time I’ve made this with homemade mayo (and others have echoed this too), the final flavor is just cleaner, fresher, and way more balanced. Once you try it, you’ll notice the difference.
- Shred the Chicken : Once the chicken has cooled slightly, transfer it to a stand mixer and mix on medium using the beater attachment until finely shredded. You can also shred by hand using two forks or a handheld mixer, but a stand up mixer is the easiest.
- Refrigerate Overnight : I know this adds time to the prep, but trust me, it’s worth it. Refrigerating the chicken overnight (or at least a half day) makes the consistency creamier and helps prevent your homemade mayo from thinning out. Remember, we’re not using any thickeners or stabilizers – heat will break the mayo down. I like to prep the mayo and shredded chicken the day before, so all you have to do is mix and enjoy.
- Mix It All Together : Add your mayo and any additional mix-ins, and stir until well combined. Chill for at least 15 – 30 minutes before serving to let the flavors meld together.
Equipment

10-Piece Glass Nesting Bowl Set
Buy Now →
16oz Glass Jars with Airtight Lids
Buy Now → Buy Now →
 Notes
- Best enjoyed within 3 days. Great with fruit, nuts, or flavored balsamic.
- Highly recommended to make your own mayo. Store-bought versions tend to have a more distinct flavor that can shift the entire recipe – and not in a good way.
- Prep Time: 15 minutes
- Chill Time: 24 hours
- Cook Time: 17 minutes
- Category: Main Dish
- Method: Boiling + Mixing
- Cuisine: American